You may know focaccia as the bread with the dimples. It’s similar to pizza with a few toppings…but not too many. The outside is crunchy and the inside is a bit chewy with lots of irregularly shaped holes. If you follow me regularly, you know this is my Year of Bread. This month I tried making focaccia at home, and the results were better than I expected.
Now that I’m elbows deep into my Year of Bread project I am learning that bread making is a matter of feel/experience, technique, and the willingness to experiment with the ingredients available to you until you find the combination that works best for your situation.
For example, in addition to making focaccia this week I also tried dinner rolls and english muffins. I used the same flour and yeast and baked my products in the same oven. The focaccia was the only one to yield a blog worthy result. That’s not to say the others weren’t edible. They just need some refinement. Practice makes blog worthy, they say.
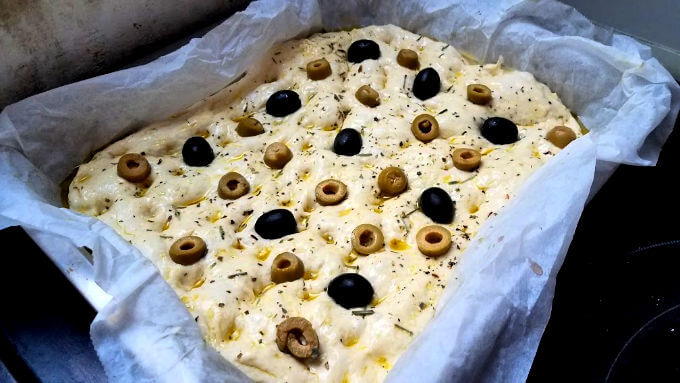
At any rate during my current bread making experiments I came across a recipe called Snow Day Focaccia by Baking With Colette. It makes a single loaf and since the dough is very wet it is stretched and folded instead of kneaded and allowed to rise. It doesn’t get much easier and it’s perfect for a lazy day when you’re going to be sticking around the house. Might as well make bread, right?
Here’s how I currently understand the process of stretching and folding the dough: It is a way to align and stretch the strands of gluten in the flour to allow your finished product to take shape. Kneading accomplishes the same thing and is faster but there are times when it’s desirable to let the whole process take place more slowly. In the case of this recipe, the dough is really too wet and sticky to allow for kneading.
Pull the dough up, fold it in towards the center. Repeat on all four sides then turn the whole mass over as demonstrated in this video.
The cool thing is each time you stretch and fold, the dough is a little bit more mature and you can see the structure taking shape. The feel of the dough will change, too.
Eventually, somewhere between 2 1/2 to 4 hours after mixing the dough, you’ll put the still very wet mass into the pan or tray you plan to bake in and let it do its thing one more time. Right before baking is the fun part. Stick your fingers into the dough, pressing them all the way through to the bottom. You’ll feel and see the gas bubbles that have formed move and push the dough into the lumpy shapes that give focaccia its characteristic look.
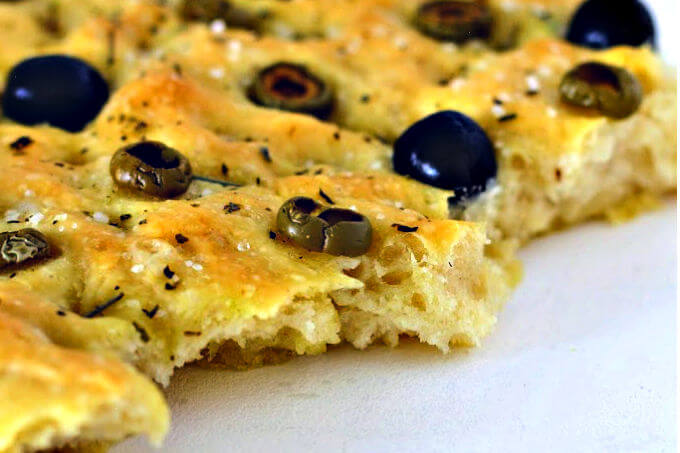
All that’s left before baking is to brush the top with olive oil and some herbs and maybe scatter some olives, nuts, tomatoes, what have you, on top. And the result! We tore into the bread before it was completely cool (there’s a reason you can’t see all the corners in my photos, hahaha). It was worth it! The bread tasted of olive oil, salt and bread with just the right amount of chewiness.
Although the bread was worth waiting for, if you make this recipe you’ll want to pick a day when you’re hanging out at home. The hands on time is minimal but with anywhere from 35 minutes to an hour between folds you don’t want to stray too far from your dough.
One last note before we get to the recipe. I know a significant number of you don’t have a kitchen scale so I’ve converted the recipe to American standards. However, many bread makers prefer to weigh their ingredients, some even weigh the wet ones. I’ve come to agree after baking with a scale a few times and since I was a scientist in another life I’m more comfortable with using grams instead of pounds and ounces. (Honestly, if you can juggle butter measurements, you’ll be able to handle it. It’s just a matter of mentally adding one more measure. 1 stick = 8 tablespoons = 1/2 cup = 4 ounces = 113 grams. See? Easy!)
Ingredients
- 1 1/2 cups 80 grams warm water
- 2 teaspoons dry active yeast my packet had 5.5 grams
- 3 cups 400 grams bread flour (I used Spanish "fuerza" or strong bread flour)
- 1 1/4 teaspoon 8 grams table salt
- 2 1/2 tablespoons 28 grams extra virgin olive oil
For the topping I used
- 1/2 teaspoon each dried oregano and thyme
- 1 tablespoon extra virgin olive oil
- black and green olives
- coarse salt
- ground pepper
Instructions
- Combine the water and yeast in a medium mixing bowl and let stand for 2 minutes.
- Add the flour and salt them mix until the flour is mixed. The dough will be lumpy but more or less stick to itself.
- Measure the olive oil into another medium bowl then transfer the mass of dough into this bowl. Cover with a towel and let stand at room temperature for 45 - 60 minutes.
- Now stretch and fold the dough.on the four "sides" then turn the whole thing over into the olive oil. (See the linked video for a demonstration)
- Repeat this 3 or 4 times at 35 - 60 minute intervals.
- Prepare a baking tray or 9" x 13" rectangular baking dish with parchment paper that's been brush with olive oil.
- Transfer the dough into the pan and gently pat and coax it to shape. Cover and let rise for 30 to 40 minutes. After 20 minutes or so you can stretch the dough a little more to fill the corners.
- Preheat the oven to 425F/220C at this point.
- When the dough has finished rising and has filled the pan combine the olive oil with the dried herbs and brush over the top of the dough. Press your fingers down into the dough to create the dimples. Sprinkle with coarse salt and black pepper and then distribute any other toppings (in our case olives) as desired.
- Place into the hot oven and bake for 15 minutes. Then reduce the temperature to 375F/190C and bake for another 8 - 10 minutes.
- The focaccia should be golden brown all over. Remove from the baking pan and brush the edges with more olive oil then let cool.
- To serve you can rip pieces off as we did, cut it into fingers that are good for toasting and/or dipping or you can cut the focaccia into sandwich sized pieces, then cut the pieces in half horizontally for making sandwiches.
I had a ton of fun making focaccia and learned something new along the way. I enjoy kneading but now I won’t be intimidated if I come across a recipe that calls for stretching and folding. Here are links to my other Year of Bread projects:
January Barbari: An Iranian Flatbread
February Ochios: A Regional Bread from Spain
I’ve been doing a lot of reading in these two helpful bread making groups. The first is Bread Baking on Facebook. There’s a nice mix of newbies and experienced breadmakers who are generous with their expertise. The group also houses an extensive library of bread recipes and sponsors a biweekly challenge.
The second group is a message board (remember them?) called The Fresh Loaf. It’s a free membership site with lots of recipes, discussion threads (some of the threads can get very lively!), and space to blog about your own successes and failures.
I’m not sure which board it was, but someone with arthritis mentioned she always folds her dough by holding the mass above a board and letting it “drip” down and then recombining it. It made me happy to think she hasn’t let a painful condition stop her from doing something that brings her joy.

Leave a Reply