If you haven’t had much experience making your own bread you’ll find flat bread is a good place to start. There aren’t many ingredients, and the results are practically guaranteed. Best of all, this easy flat bread recipe can be used for pitas, too. These will be bread like as opposed to the cracker like flat breads we made before.
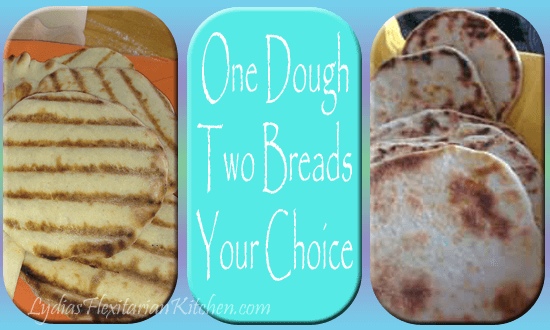
There are on-line communities dedicated to bread making. For those who would like to explore in greater depth, do check out The Fresh Loaf website. There are plenty of bread recipes, a message board for asking questions and even personal blogs for recording your experiments in yeast. I really didn’t need to make any changes to the pita recipe except to add more yeast at Rick’s suggestion. I made two batches. The first was flat breads cooked on the grill and the second was pitas cooked in a skillet on the stove top. I halved the recipe for the second batch and got eight decent sized pitas.
For the grill, I swabbed the rack with a paper towel dipped into canola oil. Fold the towel first, then hold it with tongs to dip and swab. A pastry brush doesn’t work well on a hot grill rack (ask me how I know…). I cooked the pitas in a skillet on top of the stove. Cast iron is the best choice for this as the pan gets really hot. You could also heat a pizza stone in a 450° oven and cook them on that. I’m going to try the next batch of pitas on the grill.
It will take about 2 hours from start to finish as the dough has to rise. We had plenty of flat breads to eat for lunch and dinner. I halved the recipe when making the pitas because the two of us can’t finish a batch before it loses quality. Nevertheless, they are OMG good and this is definitely a keeper recipe.
Ingredients:
- 3 cups flour, plus extra for kneading
- 1 1/2 teaspoons salt
- 1 tablespoon sugar
- 2 – 3 teaspoons yeast (use one packet if your yeast is premeasured)
- 1 1/4 to 1 1/2 cups warm (body temperature or cooler) water
- 2 tablespoons olive oil
Method:
- Put the extra flour in a small bowl (1/4 cup should be plenty), set aside
- In the largest mixing bowl you have, mix the flour, sugar, salt and yeast.
- Make a well in the center and pour the olive oil in.
- Add a cup of the water, hold the rest in reserve
- Use a wooden spoon to mix everything together. Add more water if necessary to help the dough form a ball (The first time I made it, I used the entire amount of water and the dough was way too wet).
- Put a small amount of the extra flour onto your kneading surface and turn the dough out onto it.
- Knead for about 10 minutes. The dough will be sticky. Keep adding small amounts of the extra flour as needed to prevent the dough from sticking. If it seems t0o dry, sprinkle it with water.
- In case you’ve never done it before, when I knead I fold the dough in half and push the whole thing away from me, turning it a quarter turn at the same time. Then I’ll fold, push and turn again. If needed, I’ll use a bench knife to lift the dough and add more flour. It will take awhile, but keep at it and all of a sudden the dough will change and become smoother and silkier. Form it into a ball.
- At this point, rinse out your big mixing bowl and wipe it dry. Put a teaspoon of oil in the bottom and put the dough in, turning it over to coat the entire thing in oil. Cover the bowl with a dish towel and place in a warm place, away from drafts.
- Allow the dough to rise until it’s doubled. The time for this will vary, but check after an hour. It’s doubled when you can poke a finger into the dough and it doesn’t fill in right away.
- When doubled, press down in the center and turn the dough out onto your kneading surface.
- Use the bench knife to cut the dough in half, then into equal pieces to make 8 to 12 balls of dough. Form them into balls and set aside, covered with a damp towel for about 20 minutes. Allowing the dough to rest makes it easier to roll out later.
- While the dough is resting preheat the grill or your oven to 450°F/230C.
- Roll a dough ball into an elongated oval shape, as thin as possible. No thicker than about 1/4″. Don’t fuss if it’s not perfect, rustic is fine.
- Roll out another dough ball and put both directly on the grill or oven rack. Allow to cook for a few minutes until they puff up slightly. Turn and cook on the other side.
- Serve warm as is or use as a wrap. Try ripping pieces off and dipping them into olive oil or hummus, yum!
Instructions for Pitas:
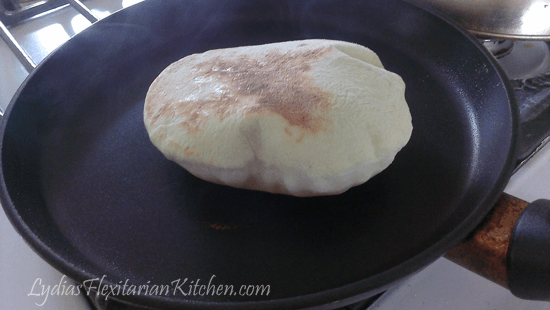
- Make pitas by rolling the dough balls into rounds about 1/4″ thick. Roll out three or four and have them ready.
- Heat a medium sized skillet until it’s very hot. Apply a very thin coating of oil to the pan.
- Place the pita in the pan and wait until it begins to puff. It will puff quite a bit. When it stops expanding, turn the pita over and brown the other side.
- Continue with the remaining pitas. Add more oil to the skillet as needed.
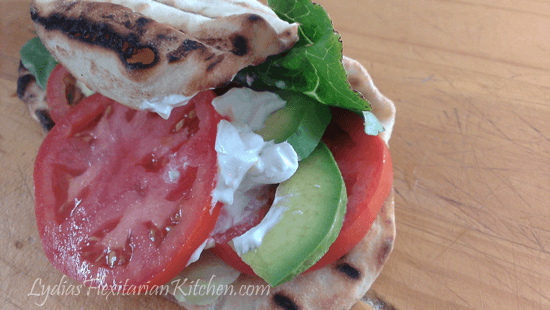
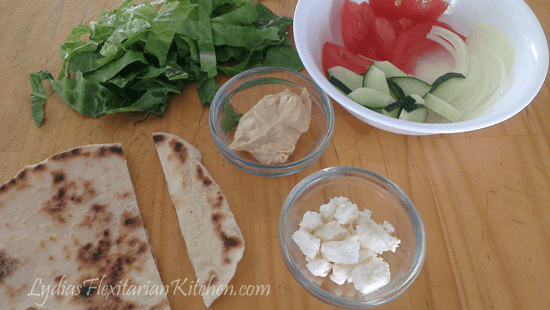
- To serve, cut a small strip from the pita and use your fingers to open the pocket. Fill with whatever strikes your fancy. In the photo I used hummus, tomato, onion and lettuce along with a little feta cheese.
Don’t be intimidated by the number of steps. This really is an easy flat bread recipe with a short learning curve. If you make them, tell me about it in the comments below. What are your favorite fillings?

I love flatbread and this recipe looks easy. I want that sandwich for lunch. Thanks for sharing.
I hope you give them a try. Thanks for stopping by 🙂